Creating work orders from the office is easier than ever with CityReporter. You can create work orders on your computer and assign them to users in the field, who will be sent an email notification at the press of a button. Work orders can be created from within an inspection (steps 1-9) or independently as stand-alone work orders (steps 10-13).
Work Orders Associated with an Inspection
1. Log into CityReporter web with your city code, username, and password. Next, double-click on the Location you would like to create a work order for.

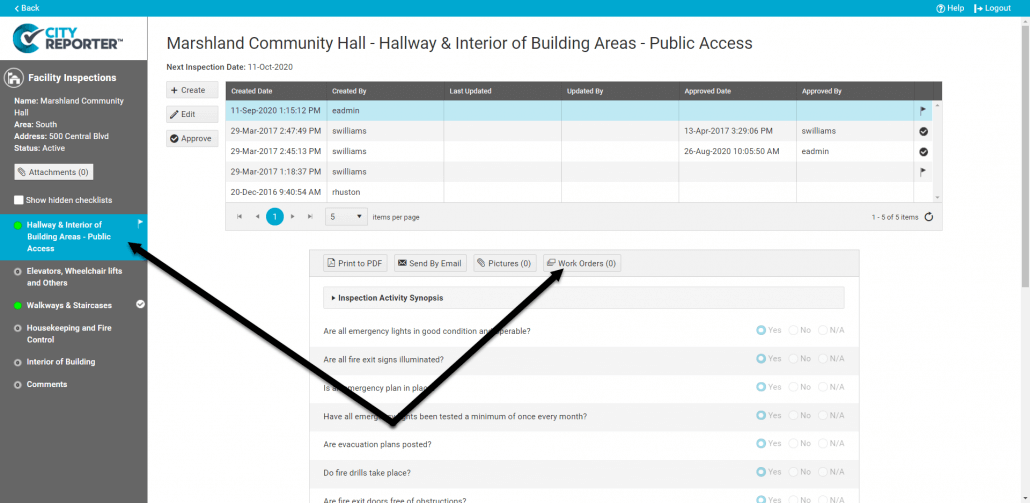
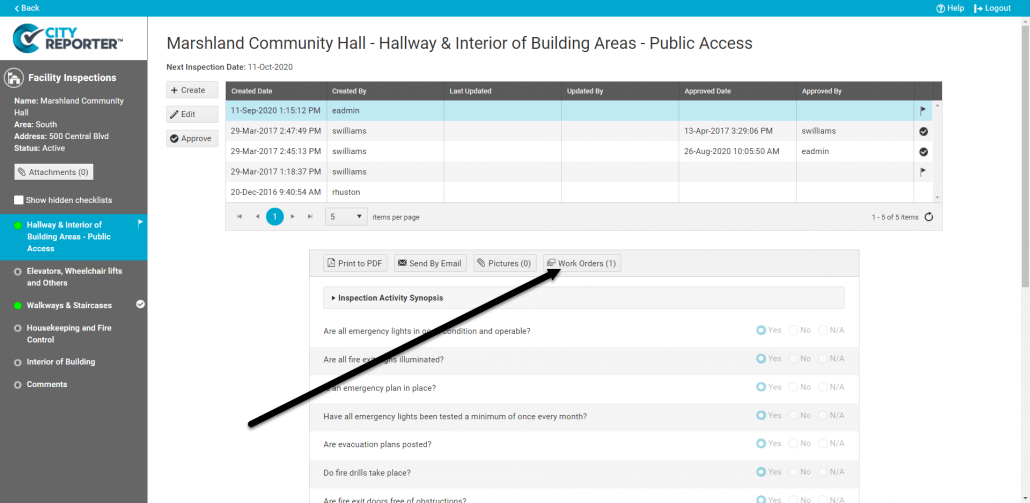
2. Once in the location, click on the appropriate form and select an inspection record from the table at the top – the new work order will be associated with this record. Click on the Work Orders button above the inspection to open any existing work orders or create a new one.
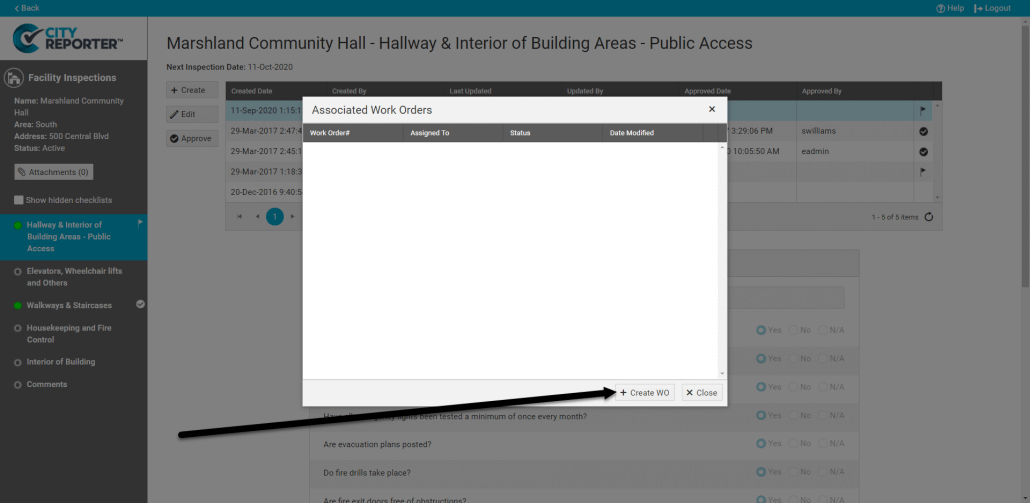
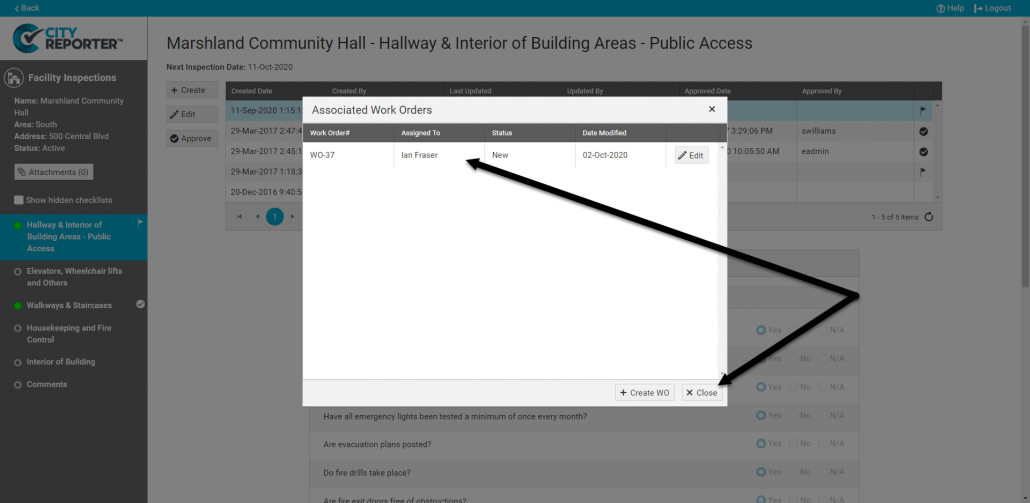
3. A dialog box for associated work orders will pop up. Click on an existing work order to edit it or click the Create button at the bottom right to make a new work order.
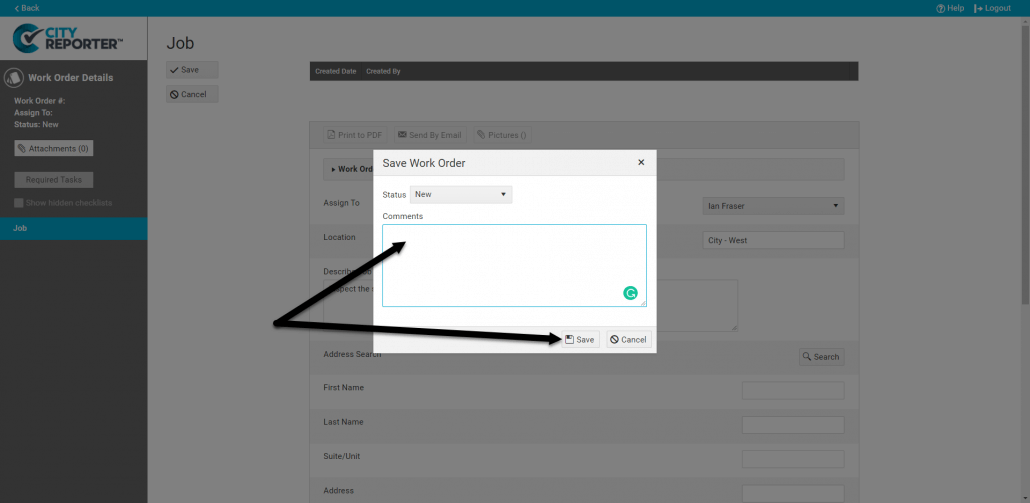
4. Fill out the required information in the Job Sheet and then click the Save button at the top of the screen.

5. In the dialog box that pops up, the Status drop-down indicates this is a New work order, although you can change it to a different status if needed. Enter any comments you would like your staff or supervisors to see, then click the Save button at the bottom right of this box.

6. If you have Tasks set up in the Work Orders module, you can add them to the work order at this point by clicking on the Required Tasks button (see How To Add Required Tasks to a Work Order on CityReporter Web for more details).

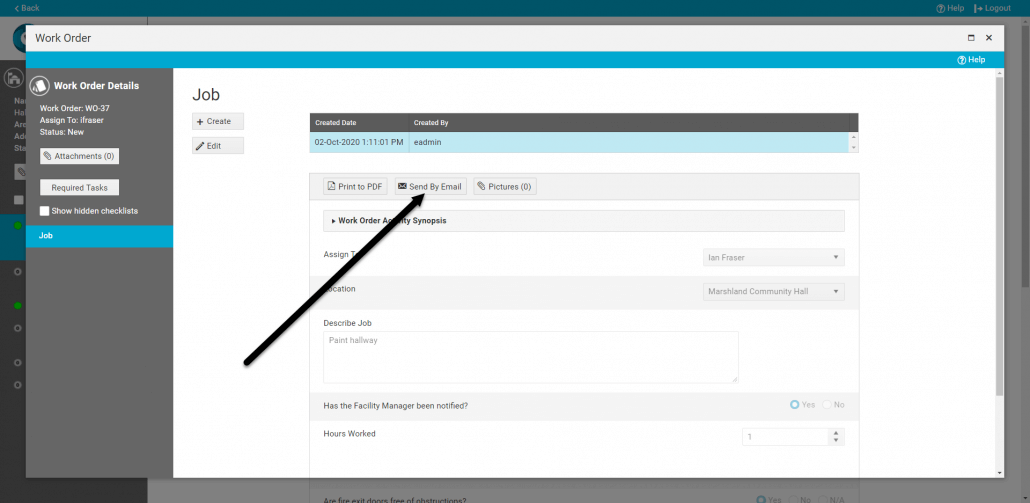
7. Click the Send by Email button if you would like to the work order sent to the user it was assigned to.
8. Close the Job Sheet by clicking the x in the top right corner of the window. Your new work order will automatically receive a work order number and will be listed in the “Associated Work Orders” window. Click the Close button to return to the inspection screen.
9. You will now see a change in the number next to the Work Orders button above the inspection.
“Stand Alone” Work Orders
10. You can also create a Work Order not associated with an inspection from within the Work Orders module. Select the Work Orders module from the left side of the main screen, then choose the tab for the group you would like to add the Work Order to. Or choose the “Other” tab to add a work order that doesn’t fit in one of the existing groups.

11. Click the Create button at the bottom of the screen.

12. Fill out the required information in the Job Sheet. The fields on this screen will vary based on how your Job Sheet is customized. Click Save when done.

13. In the dialog box that pops up, change the Status and enter comments if desired, then click the Save button at the bottom right of this box. Once saved, tasks can be added and/or the work order can be sent by email (see steps 6 and 7 above).