You may need to create a web inspection using CityReporter web for a variety of reasons. For example, if you forgot your mobile device when you went to do an inspection, you can enter the inspection data on the web once you’re back in the office. Or, you might create web inspections to resolve outstanding faults once your maintenance staff has fixed them, rather than send your inspector back to the field.
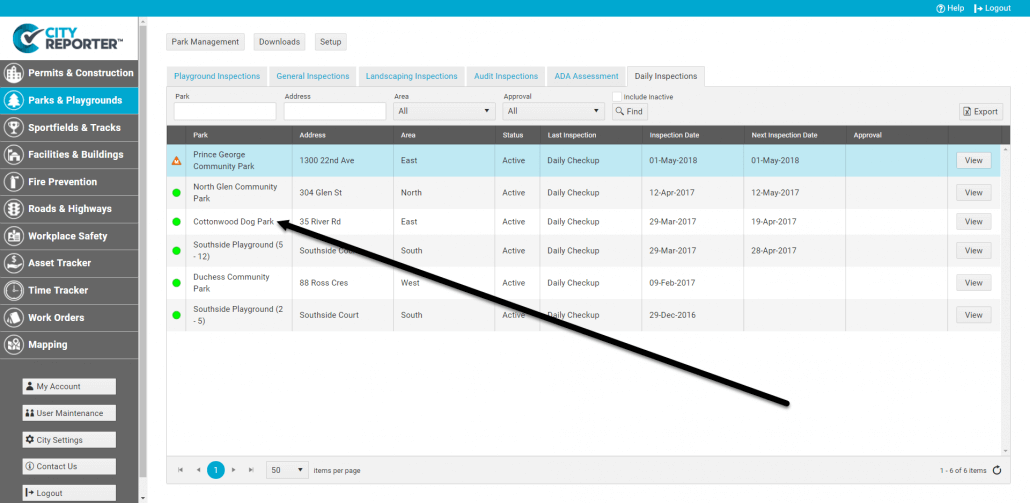
1. Log into CityReporter web using your city code, username, and password. Select the appropriate module and double click on the location you would like to do the web inspection on.
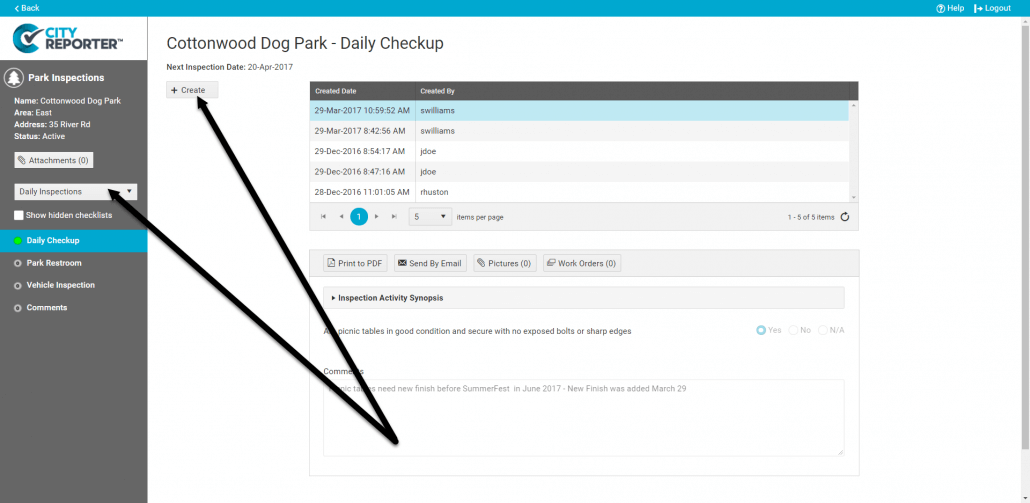
2. If necessary, change the inspection group using the drop-down menu on the left side of the screen. Select the correct inspection, then click the Create button at the top of the screen.
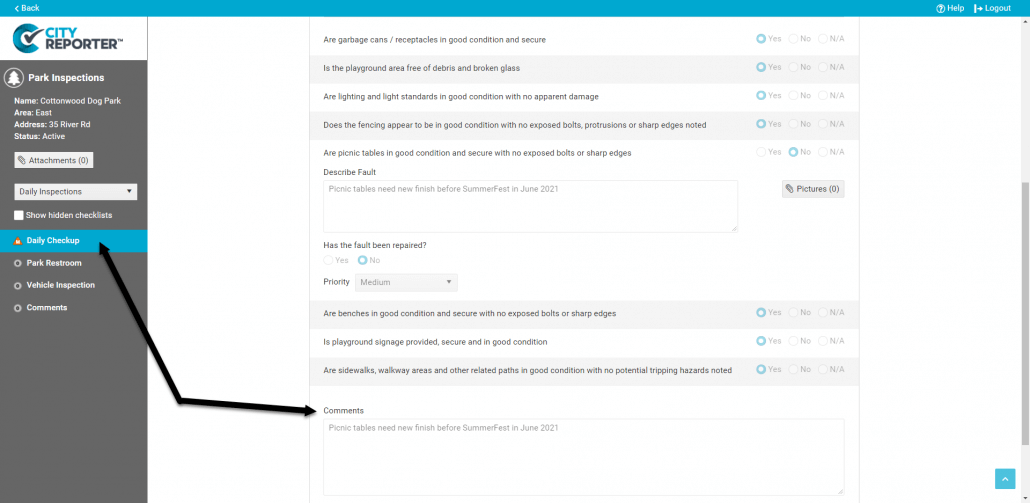
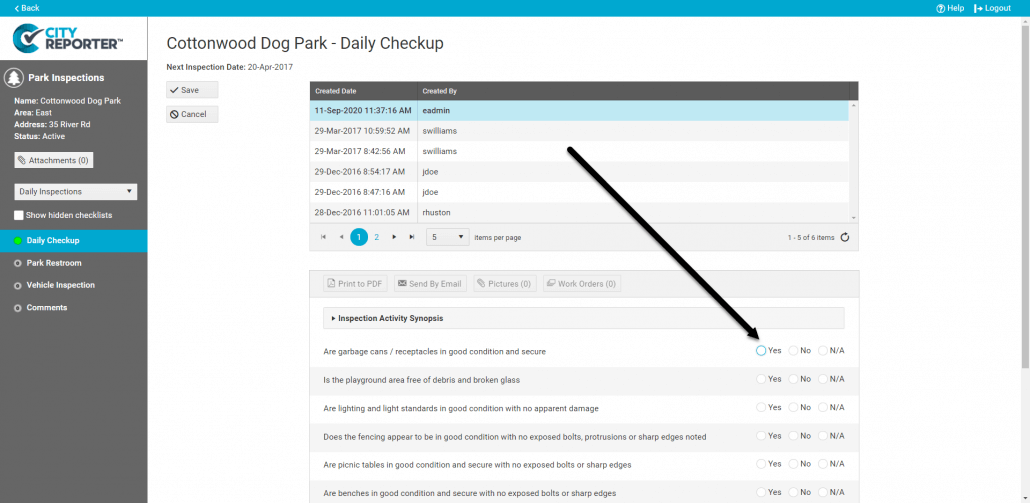
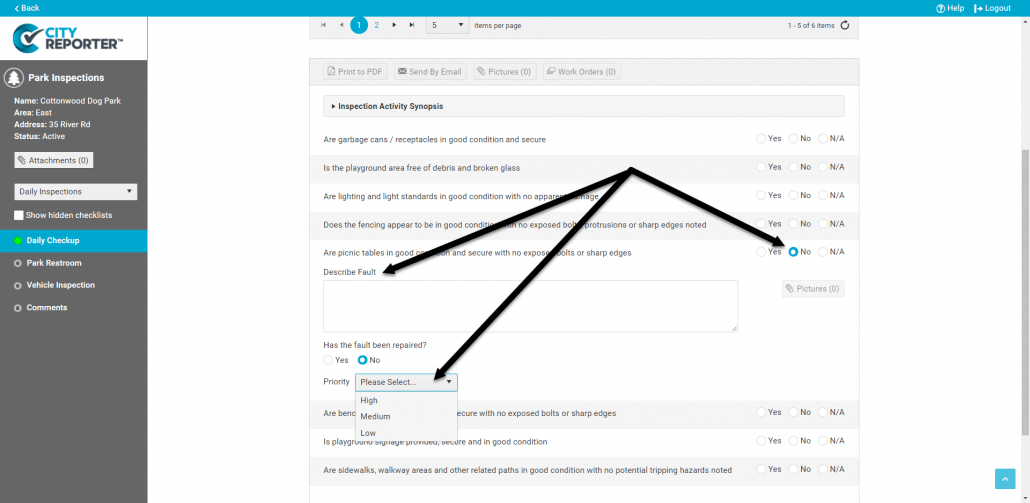
3. You can now answer the questions using the buttons on the right side of the inspection screen. Select No to indicate there is a fault. Selecting either Yes or N/A will not create a fault.
4. If you select No because there is a fault, a Comments field appears where you can describe the fault. Set the priority level if applicable using the drop-down menu. Unlike mobile inspections, pictures cannot be attached until the record is saved.
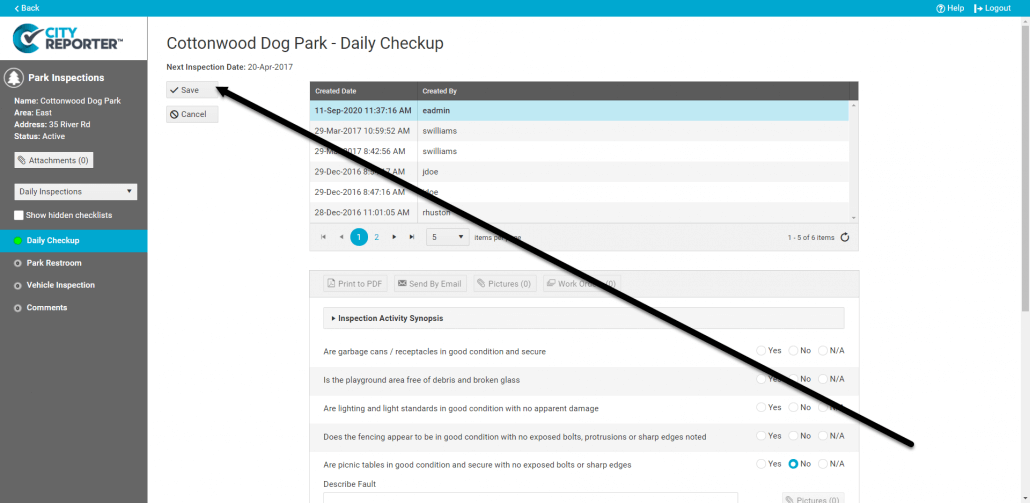
5. Once you have completed your inspection, click Save at the top of the screen.
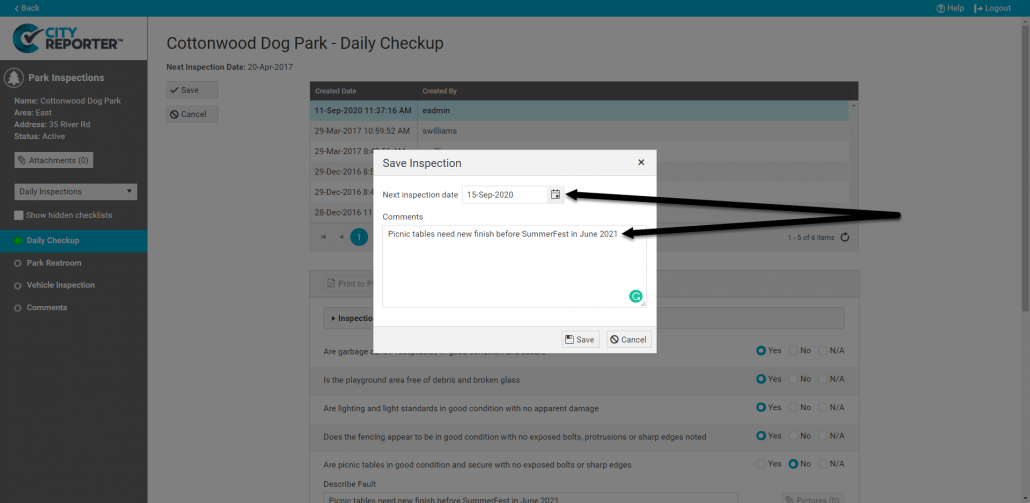
6. In the Comments box that pops up, you can add general comments and set the next inspection date.
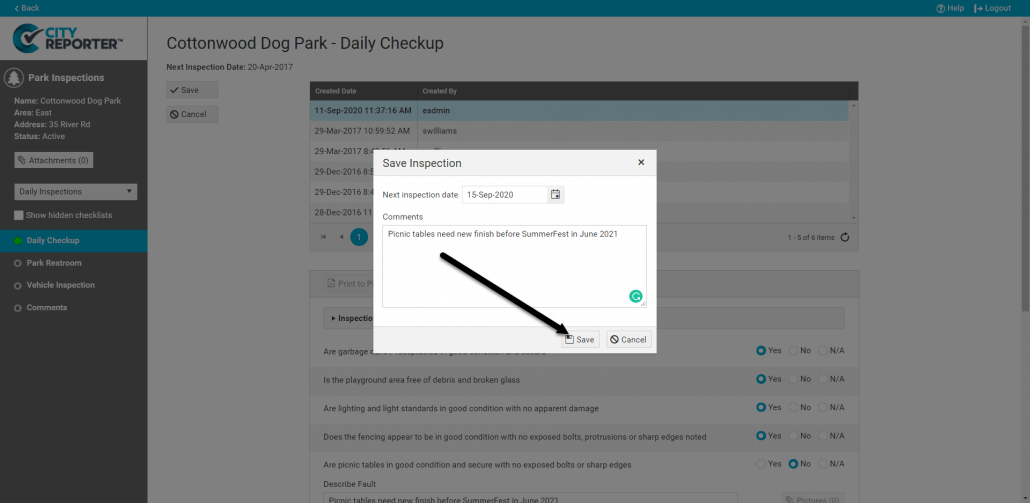
7. Click Save to finalize the inspection.
8. Now that your inspection is complete, the status indicator changes color, according to whether there is a fault and at what priority that fault is. You will also see your general comments at the bottom of the screen. Attach any photos to the inspection at this point.