


Completing an Application
Newly created Permit Applications have the status “Application” (see our tutorial How To Create a New Permit Application). Once all Application information has been entered and the necessary documents have been attached, the status is changed to indicate it is ready to be reviewed by the building inspector. To learn more about all permit statuses, see Overview of Permit Statuses.
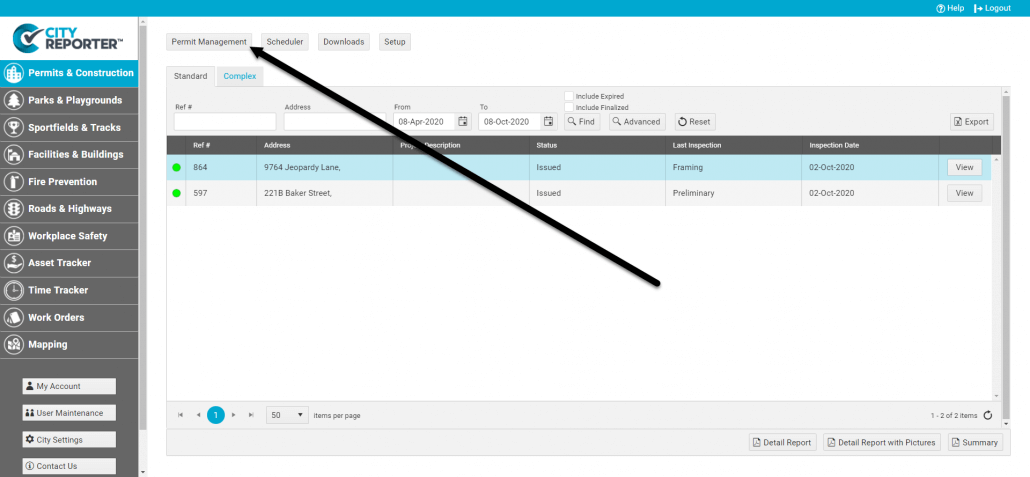
1. Log into CityReporter using your city code, username, and password, then select the Permits & Construction module button on the left.
2. Click on Permit Management at the top of the screen. You must have a module role of Permit Manager, Setup Manager, or Administrator to access Permit Management.
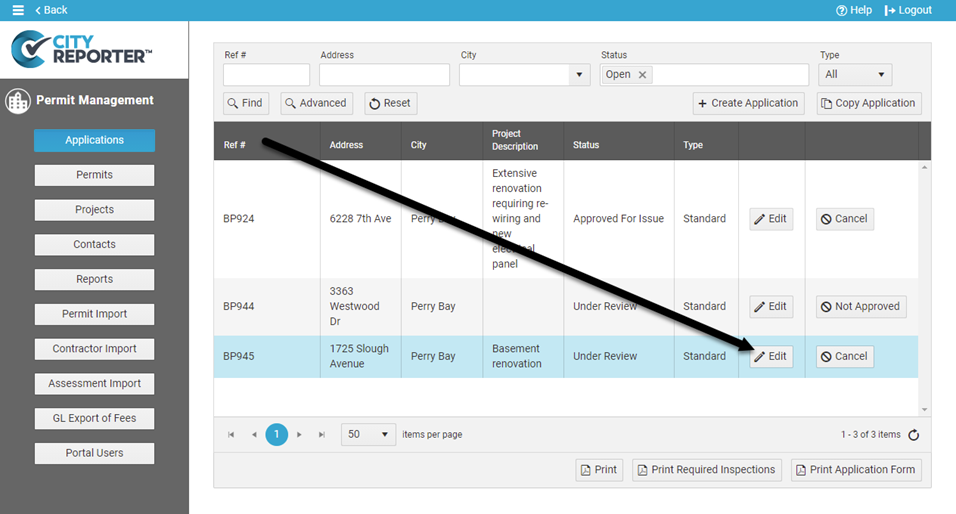
3. In the Permit Management screen, click Applications on the left.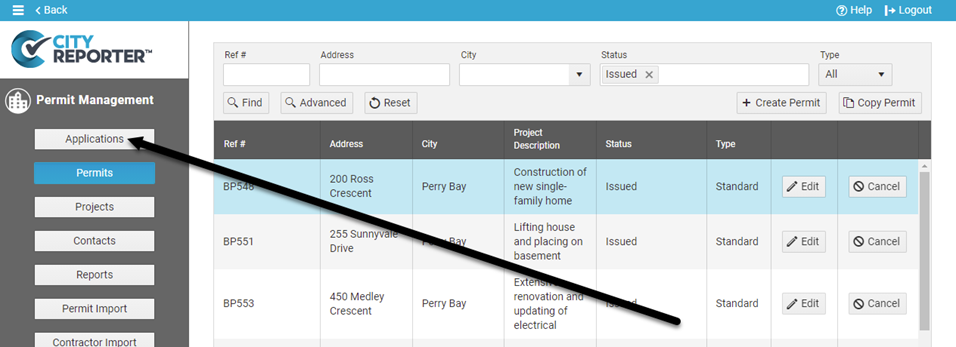
4. Double click on the Application in the Applications table or click Edit next to it to open it in the Permit Editor.

5. If the Application is complete and ready for review, click Change Status and select the status Under Review. Or select Not Approved if the Application has been denied.
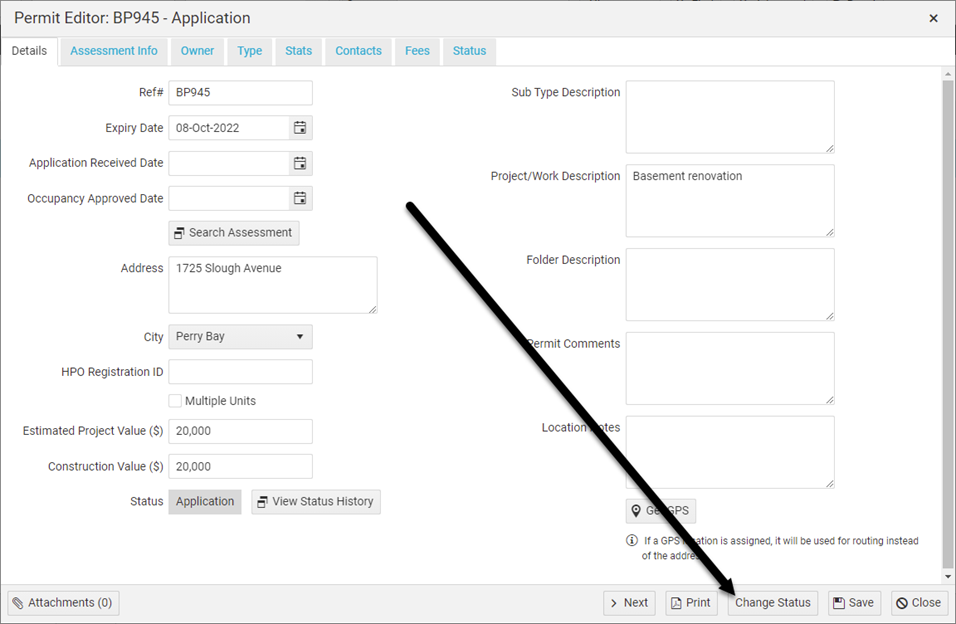
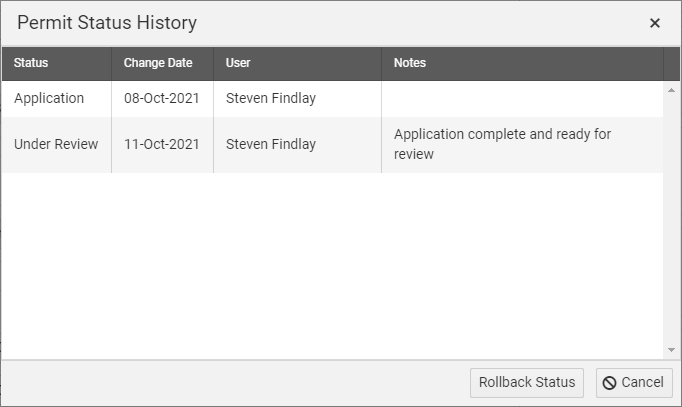
6. You may enter some notes, which will be recorded in the permit’s Status History. Click Save to confirm the status change.

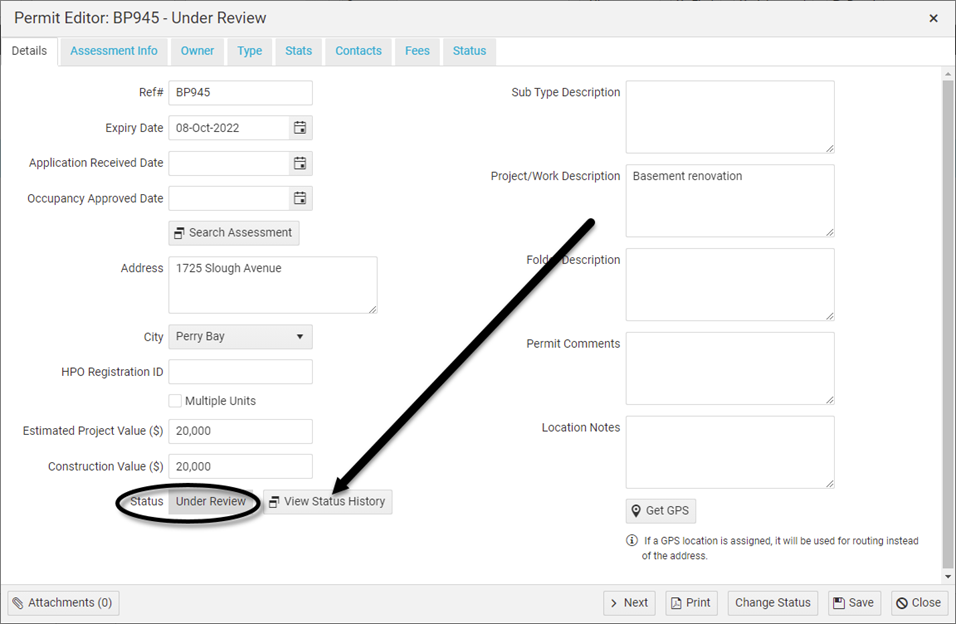
7. The status will change to “Under Review” or “Not Approved”. Click View Status History to view all status changes and any associated notes.
Reviewing and Approving an Application
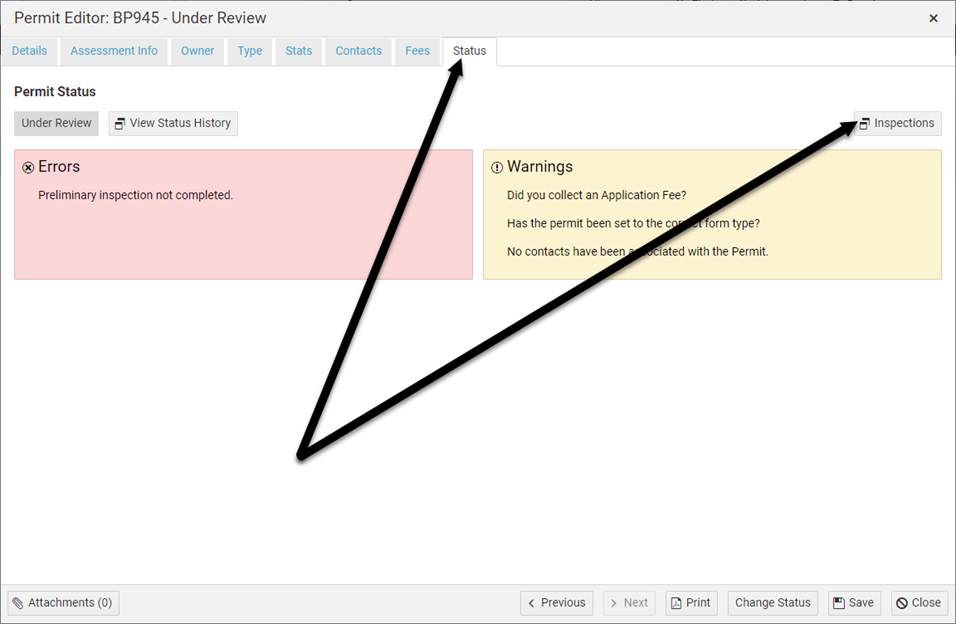
When a Permit is “Under Review”, the building inspector will be able to review the information and conduct the Preliminary inspection. The Preliminary inspection is a form with items that must be accepted before the Permit status can be changed to “Approved for Issue”, for example, a plan check and letters of assurance. If you do not wish to use the Preliminary inspection form, it can be disabled under the Type tab.
1. Double click on the Application in the Applications table or click Edit next to it to open it in the Permit Editor.
2. Select the Status tab, then click the Inspections button. In the new window that opens, complete the Preliminary inspection. Close the window when done to return to the Permit Editor.
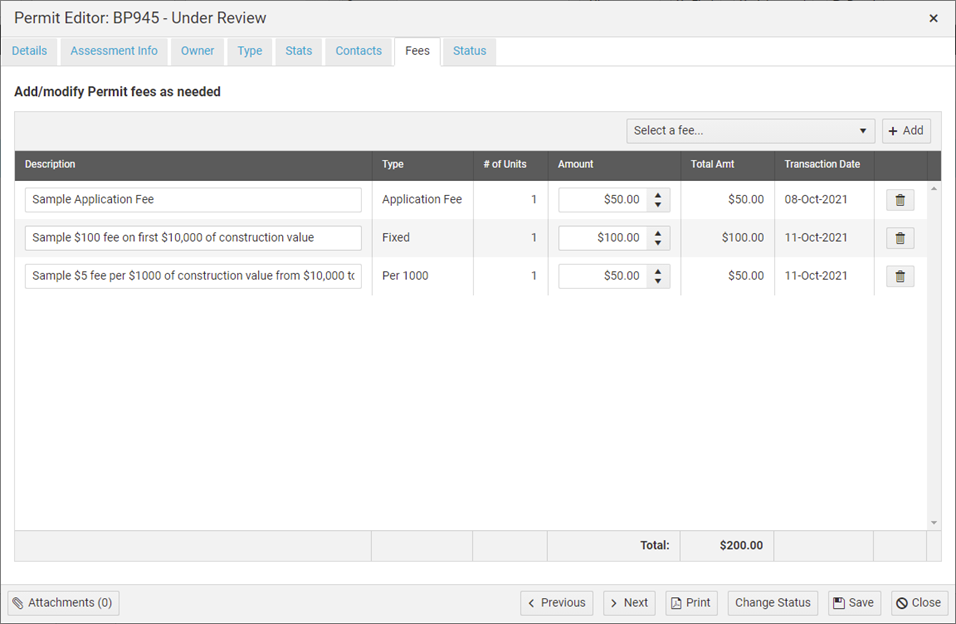
3. You can also add fees and payments at this time – see How To Create a New Permit Application for full details on applying fees.
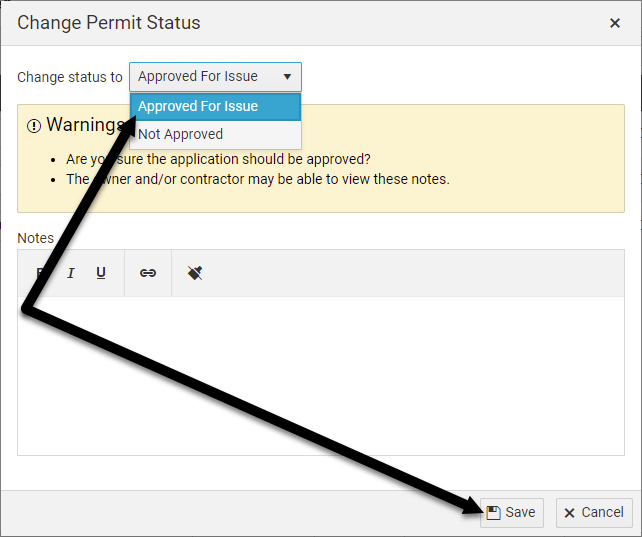
4. Once the Preliminary inspection has been completed and any fees have been applied, the permit is ready to be approved. Click Change Status and select the status Approved for Issue. Enter notes if desired and click Save.
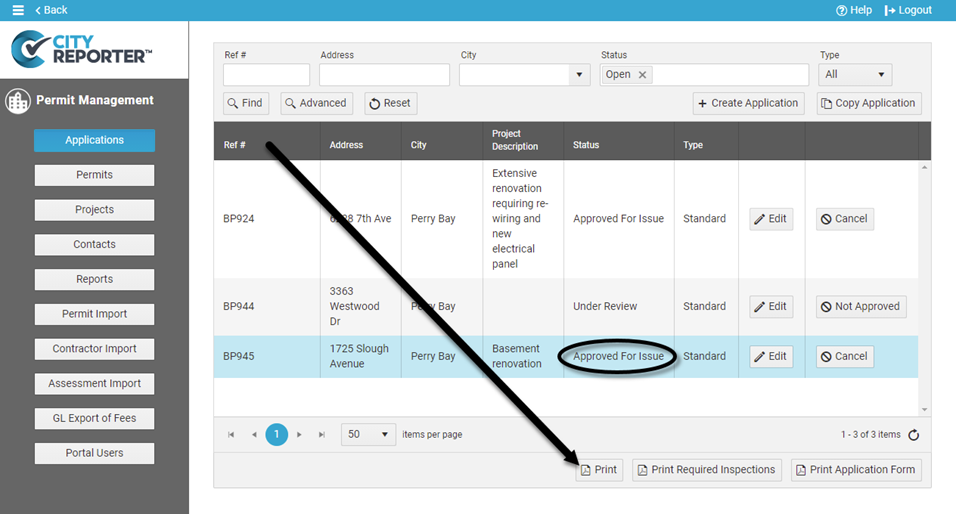
6. The status on the Applications screen will now say “Approved for Issue”. You are also able to print a copy of the approved permit, which provides a summary of the information and associated fees. Print from the Permit Editor or click the Print button at the bottom of the Applications table.
Issuing an Application as a Permit
In this stage of the process, the inspector or building clerk indicates the fees have been collected and verifies all requirements are met, allowing the Application status to go from “Approved for Issue” to “Issued”.
1. Double click on the Application in the Applications table or click Edit/View next to it to open it in the Permit Editor.

2. First verify all fees have been paid by selecting the Fees tab. Record payments by selecting the Payment item from the drop-down list at the top of the tab. The items available in the list are set up under the Fee Setup screen. Select Add. The Payment item will appear in the table with a zero amount.
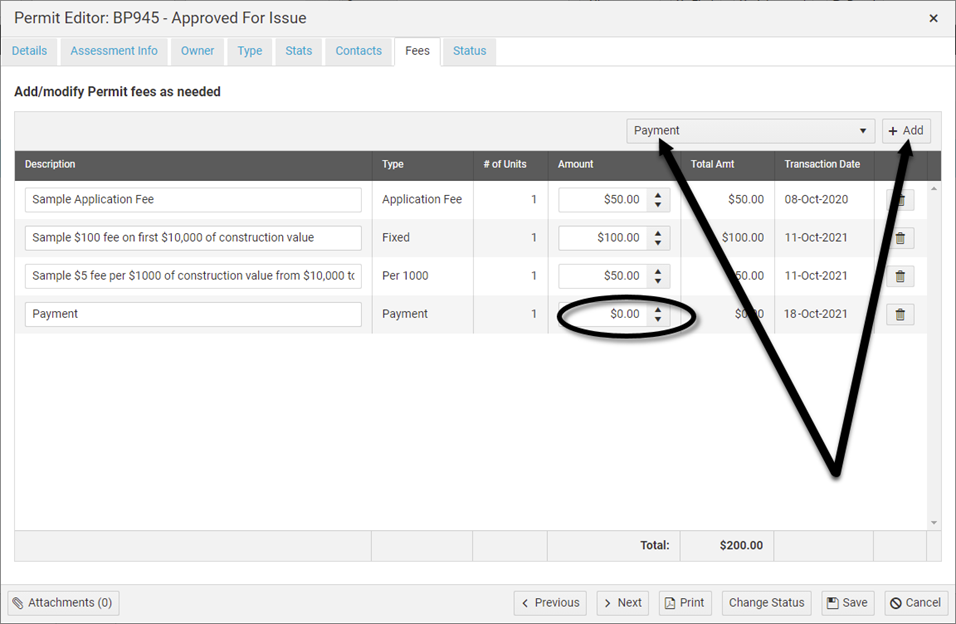
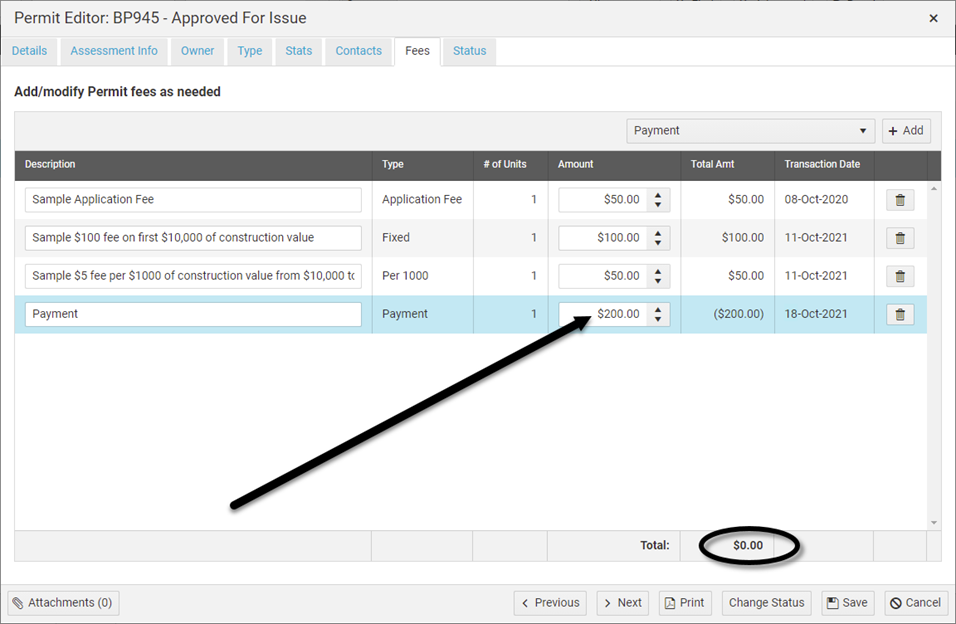
3. Enter the amount paid in the Amount column, which will update the total at the bottom. Once the total equals zero, the Application status can be changed to “Issued”.
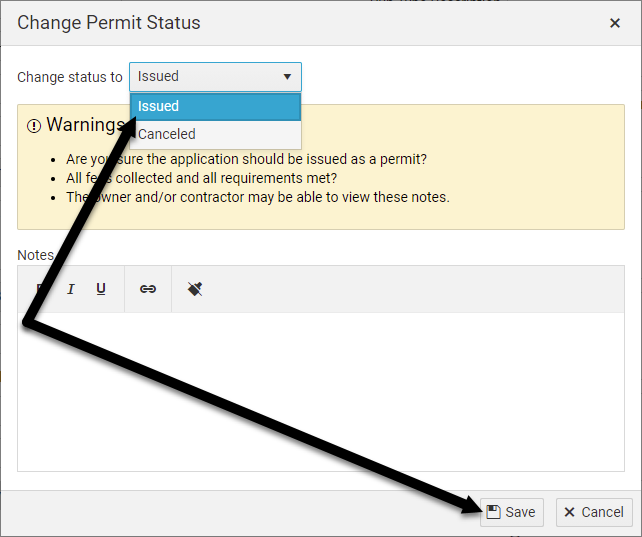
4. Click Change Status at the bottom of the Permit Editor. Select the status Issued and enter notes in the Change Permit Status window if desired. Click Save to confirm.
5. The Permit’s status will indicate that it has changed to “Issued”. It can now be accessed from the Permits screen and will no longer be accessible from the Applications screen.
