Quickly Record Hazards With Custom Drop-Down Menus
When doing inspections using the CityReporter mobile app, you need to note the details of any safety hazard or problem that you find. Generally, inspectors will quickly type a few details using the on-screen keyboard on their smartphone or tablet.
There may be times when typing these comments out can seem labor-intensive. If the inspector isn’t used to texting, finds the on-screen keyboard too small for their fingers, or needs to enter the same information repeatedly, they may become frustrated with the process.
By spending a little time up front customizing the app, you can create drop-down lists with descriptions of common safety hazards. With a couple taps on the touch screen, the inspector can then select which of the preloaded list items they would like to insert into the fault description field – saving plenty of time typing in the field. Follow the instructions below to start setting up some of your own custom drop-down menus.
Identify Some Common Hazards or Faults
Before you begin setting up the custom drop-down menus, you’ll need to think of which inspection questions typically have the most frequent violations. If you’re not certain which faults crop up the most, use one of the built-in reports to see a list of all the faults that were found in a particular time period.
Refer to our tutorial on How To Report Faults and Fault History to find your fault patterns.
Set Up Some Typical Fault Descriptions
Once you have reviewed the Faults report, you will have a better idea of what the most common faults are and what the most common fault descriptions are. Now you can begin preloading some notes that inspectors can quickly and easily insert into the fault description field while out on the job. Just follow the steps below. This tutorial applies to the following modules:
- Facilities & Buildings
- Fire/Code Enforcement
- Parks & Playgrounds
- Permits & Construction
- Sportfields & Tracks
- Workplace Safety
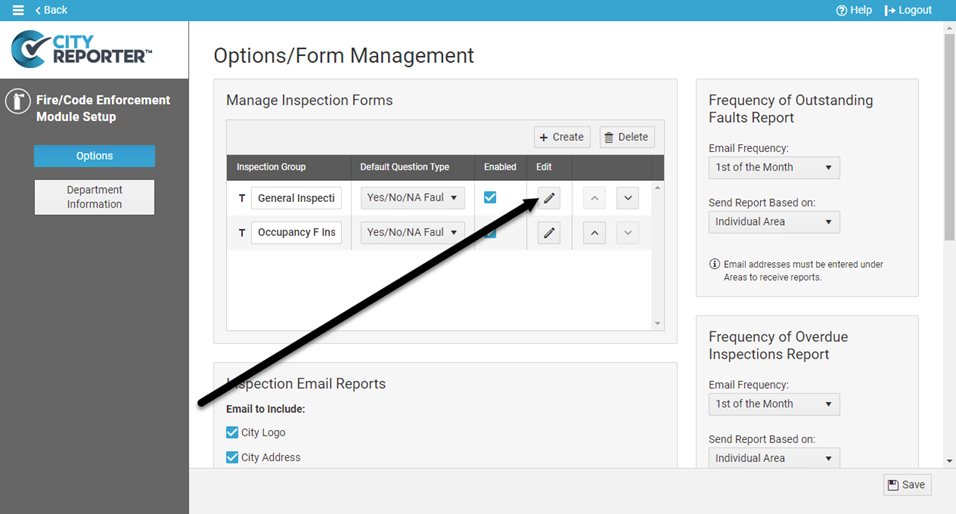
1. Using your computer, log into CityReporter web with your city code, username, and password. Select a module and click the Setup button at the top of the screen, as shown. You must have Administrator permissions in order to access the Setup button.

2. Select the Edit button beside the group of forms you would like to work on.
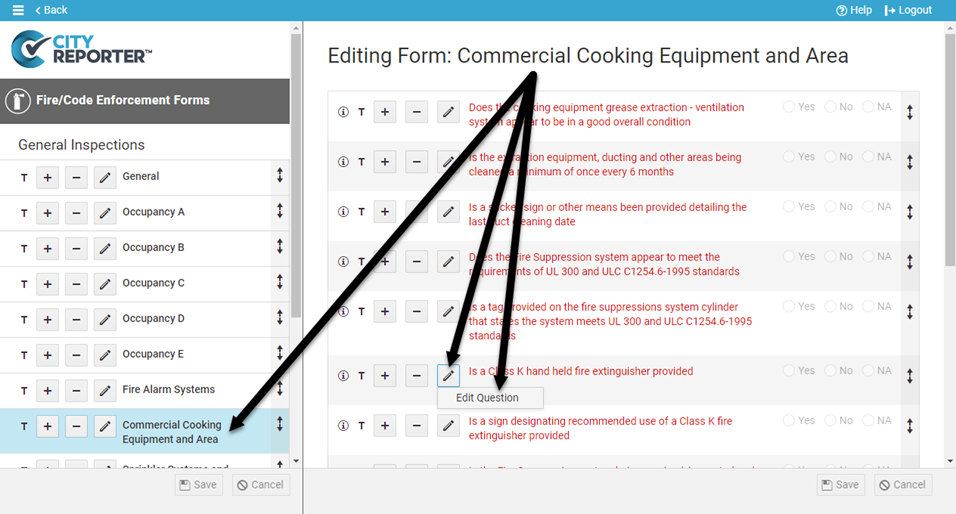
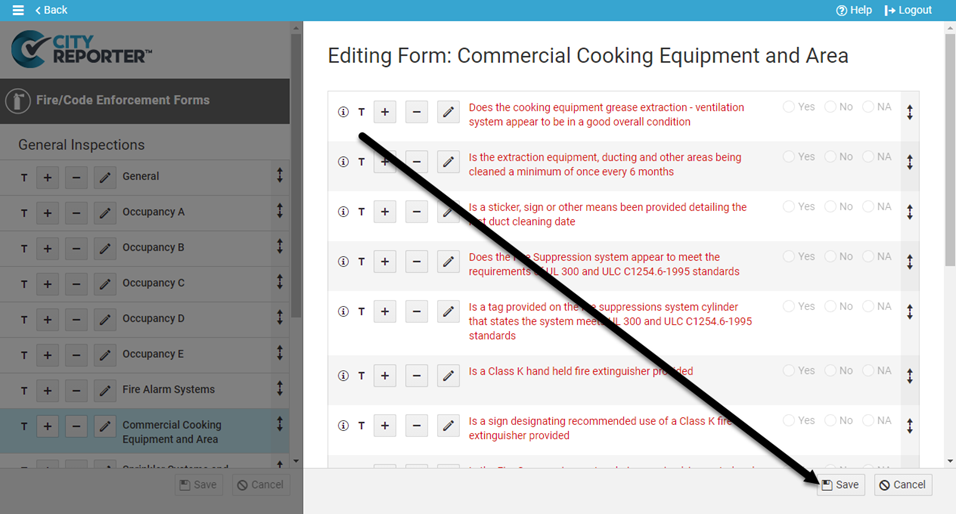
3. Select the form you would like to edit on the left. Click the Pencil button beside the question you would like to edit and select “Edit Question”. Preloaded fault descriptions can be set up for all fault question types, rejected question types, and the complex question type. To view a question’s type, hover over the Info icon.
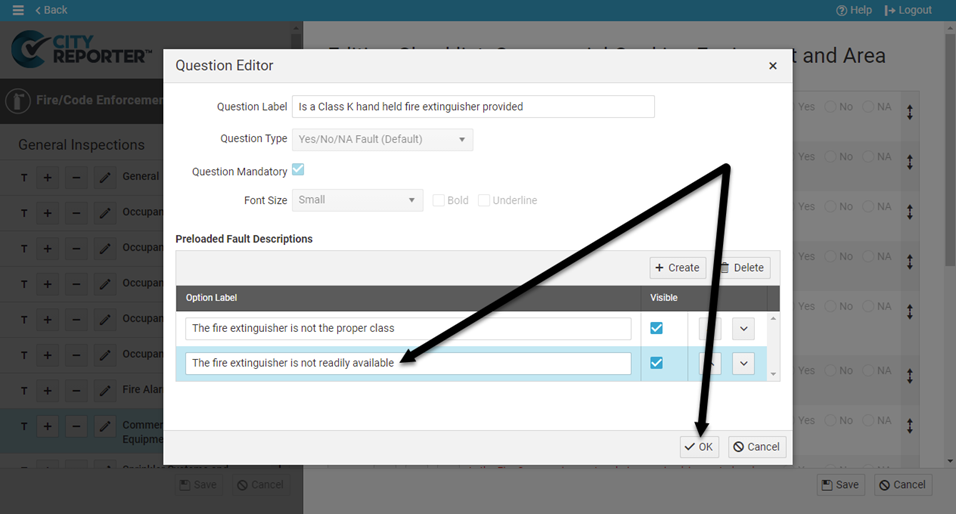
4. In the Preloaded Fault Descriptions table, click the Create button. Type in some text for a common fault description. In this example, we are adding an option for the question, “Is a Class K hand held fire extinguisher provided?” Two common faults might be “The fire extinguisher is not the proper class” and “The fire extinguisher is not readily available”. You may want to cite relevant sections of code in the descriptions to easily add them to your inspection reports.
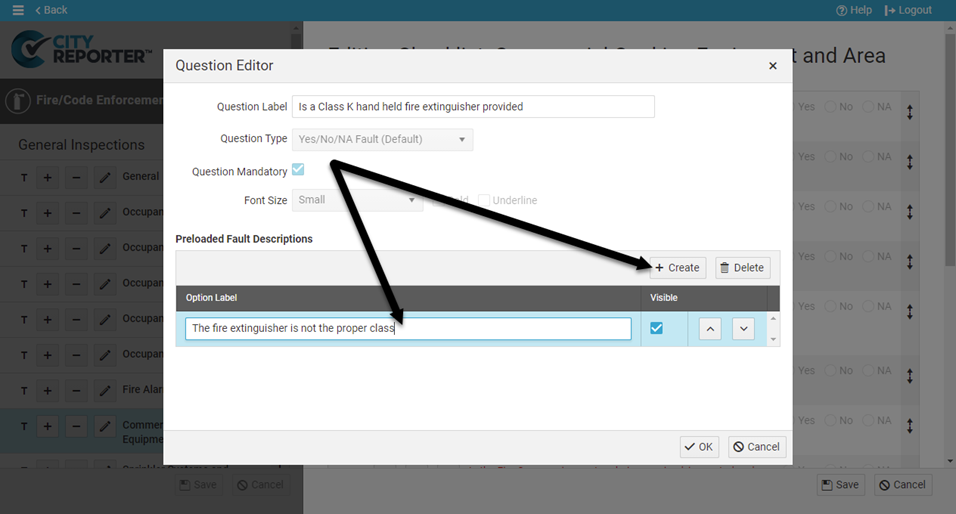
5. To add more options to your drop-down list, just click the Create button again and type in other fault descriptions you may want available for the inspector. Once you are finished, click the Ok button.
6. Save your changes by clicking the Save button at the bottom right of the screen. If you navigate away from this page before saving your changes, they will be lost.
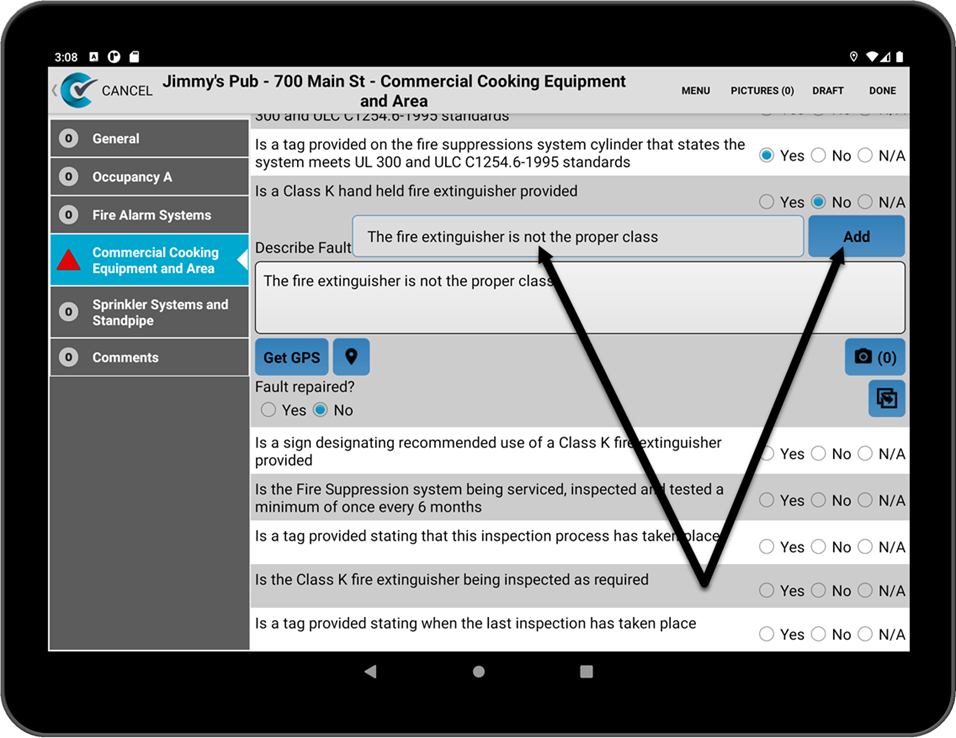
7. Remind your inspectors to tap the Refresh button in the mobile app before their next inspection. The drop-down list will appear when the question is answered “No”, and they can use it to instantly Add preloaded notes to the fault description field.