CityReporter provides an easy way to take photos of safety hazards or problems discovered during an inspection. There’s also a way to take photos during the re-inspection after all issues have been repaired.
1. Using your mobile device, log into CityReporter mobile. Open a location that has a fault you need to re-inspect.
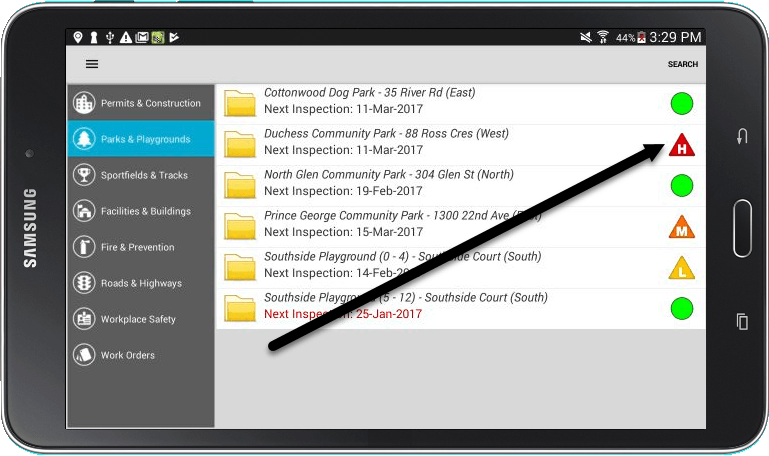
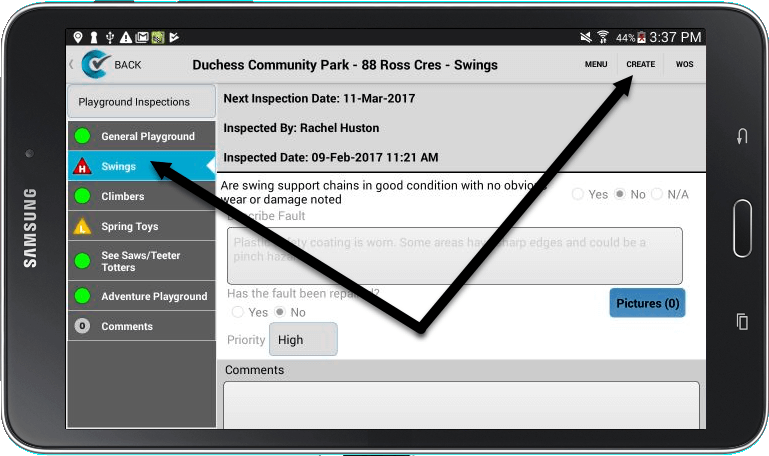
2. Tap the form that has a fault you need to re-inspect. Tap the Create button to start a new inspection.
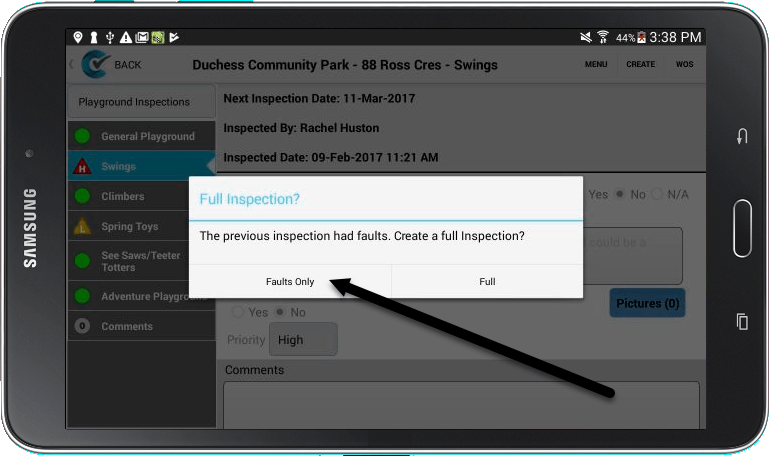
3. You will be asked if you want to inspect all the items on the form, or just the faults. Tap the Faults Only button.
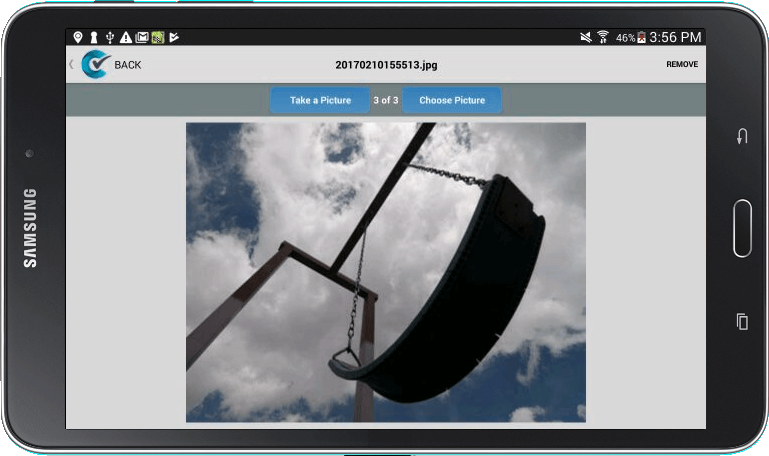
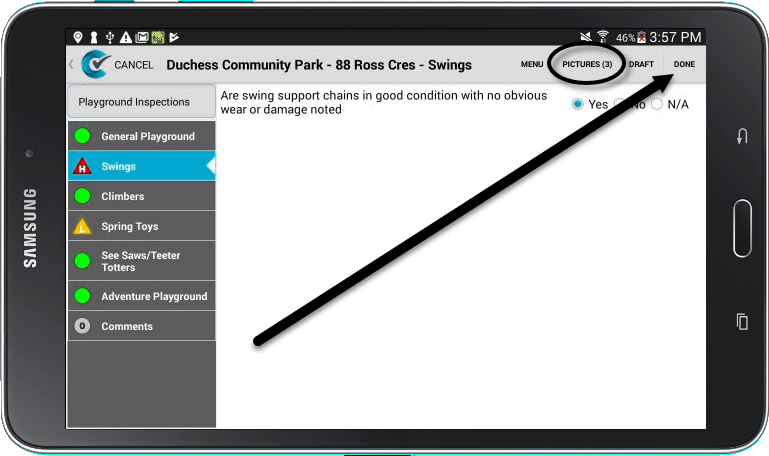
4. Your inspection form will have only a few questions, or even just one, instead of the full form. You should now be able to answer “Yes” to the questions since they have been repaired. To take photos of the repair, tap the Pictures button as shown.

5. Take as many photos as necessary to fully document the repair.
6. When you return to the inspection questions, you’ll now see the number of photos reflected on the Pictures button. Tap the Done button.
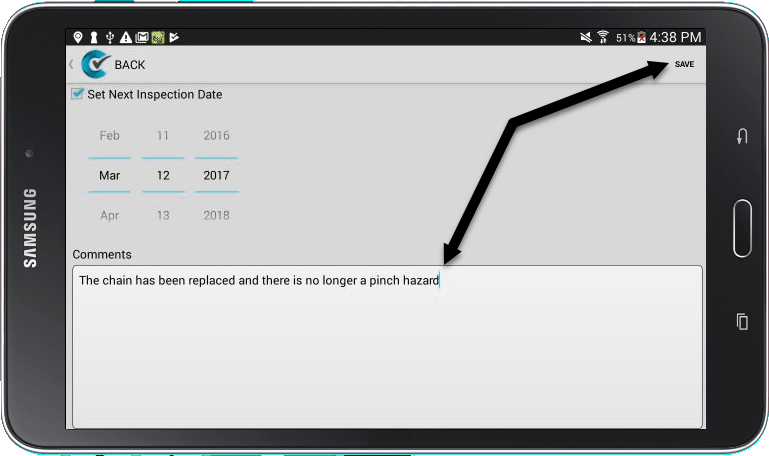
7. Next, you’ll be taken to a form where you can add any comments about how the item was repaired. Press Save to complete your re-inspection. Now it just needs to be filed to the cloud (see our tutorial for How to File Records Two Different Ways).